Tailscale
Tailscale is a VPN mesh tool pre-installed in FlexKVM — join your devices into one encrypted virtual network. No public IP needed, no router port forwarding to configure. The free tier supports 100 devices.
Before using, sign up for an account at tailscale.com.
Go to Web interface → Settings → App Center.
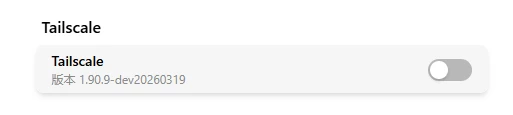
Enable the Service
Toggle the switch to enable — takes effect immediately. Once enabled, the description text shows the Tailscale version.
Login
Two login modes are supported — Web Login and Authkey Login — switched via the "Login Mode" radio. Before logging in you can fill in the Login Server — leave it empty to use the official Tailscale control plane, or enter a self-hosted headscale server address to join your own server (an http:// address shows a plaintext-transmission warning; https:// is recommended).
Web Login (default)
Click the Login Status button to start:
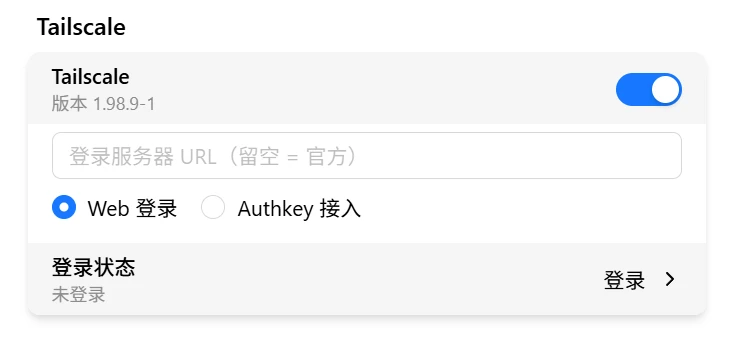
Wait a few seconds for the login link:
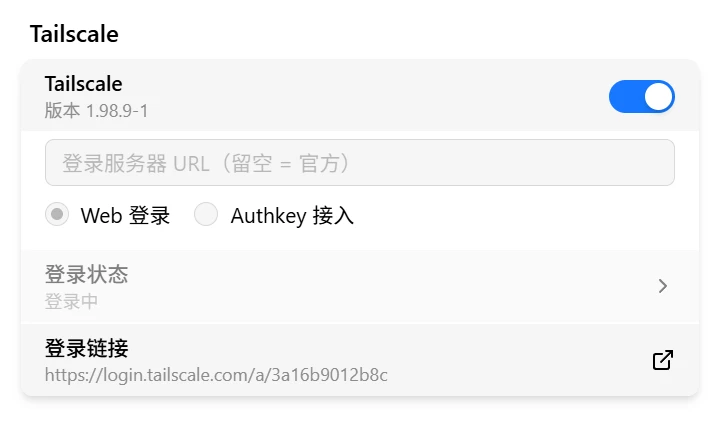
Click the login link → browser opens Tailscale auth page → choose your sign-in method (Google / Microsoft / Apple / email):
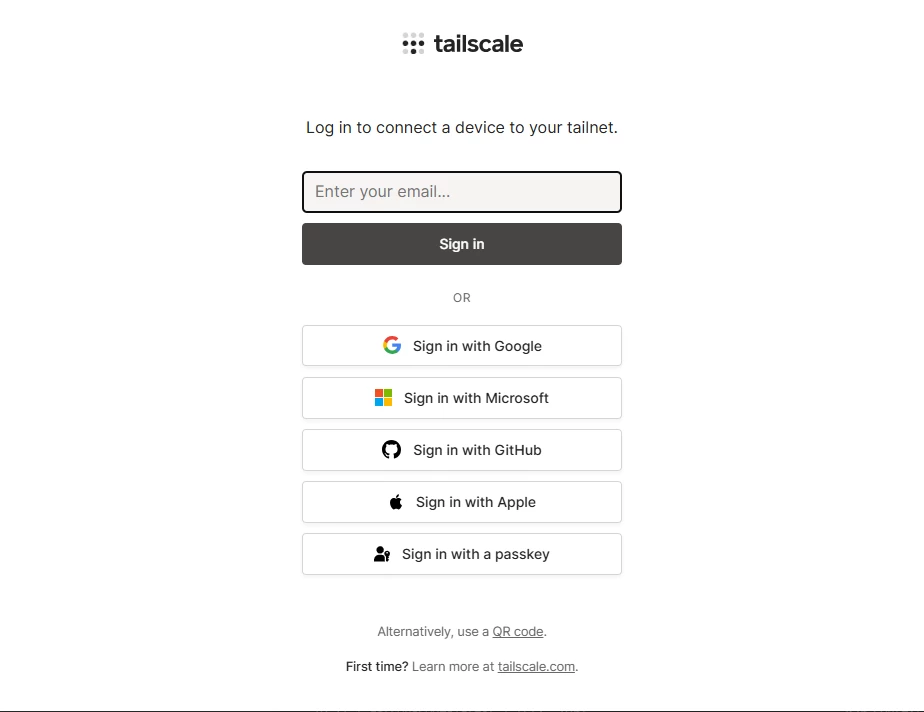
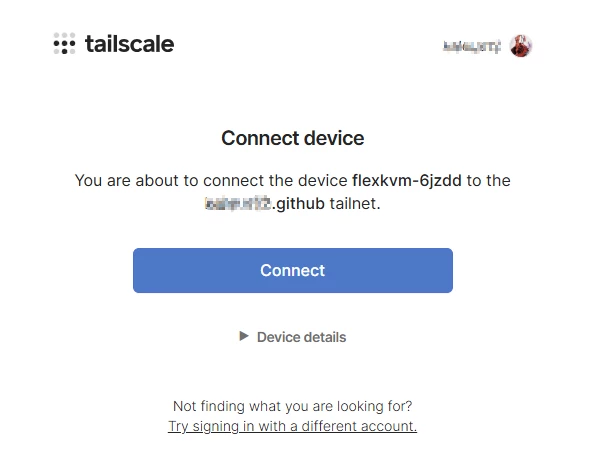
After signing in, click Connect to authorize the device to join your Tailscale network:
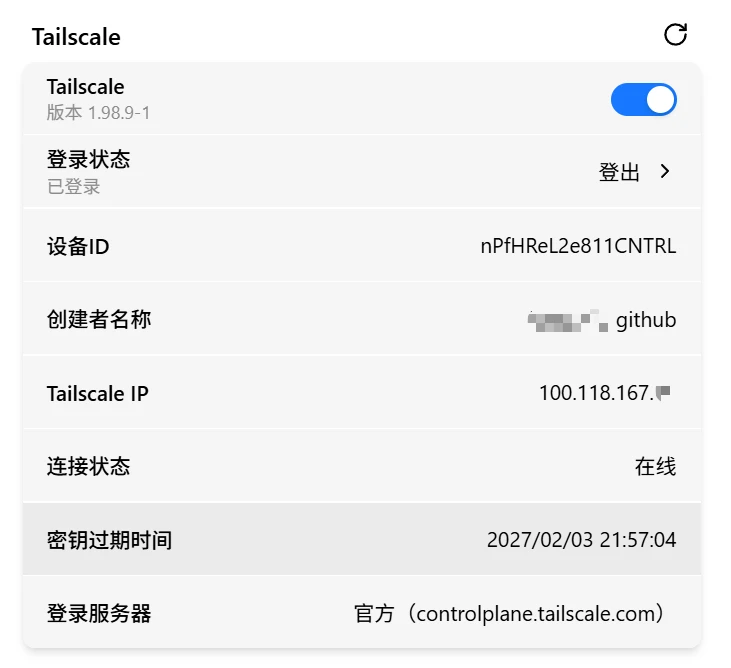
Verify: The page auto-redirects back to the management interface, showing the device has joined. You can close the page at any time during login — the process runs asynchronously in the background.
Authkey Login
For self-hosted headscale servers or browser-free automated onboarding (e.g. pre-authorized keys tskey-auth-...):
- Switch login mode to Authkey Login
- Paste the pre-authorized key (starts with
tskey-auth-) into the Authkey field - Click login
The key is single-use — cleared immediately after successful login and never stored on the device. Login failures show the backend's reason directly (e.g. invalid or expired key).
Connection Info
After successful login, the interface shows:
| Info | Description |
|---|---|
| Device ID | Unique identifier of this node in the Tailscale network |
| Tailnet name | Current network name |
| Tailscale IP | Assigned IP (100.x.x.x) |
| Connection status | Online / Offline |
| Key expiry | Expiration date and time of the node key |
| Login server | Official (controlplane.tailscale.com) or self-hosted headscale address |
Click the refresh button to update connection status.
Logout
After login, the button changes to Logout. Click Logout → the device is removed from the current Tailscale network and the Tailscale IP is released. To reconnect, just log in again — no waiting.
Remote Access
After logging in to Tailscale, install Tailscale on the device you want to access FlexKVM from and log into the same account. Then:
- Web interface:
https://<Tailscale IP>(e.g.,https://100.x.x.x) - SSH:
ssh <username>@<Tailscale IP>
It's just like being on the same LAN — works through NAT and firewalls.
For advanced features like ACL access control and device sharing, see the Tailscale official documentation.
Peer Relay: Accelerate with a VPS Relay
When a direct connection fails, Tailscale falls back to its official DERP relay servers, most of which are overseas — high latency for users in China. Peer Relay is Tailscale's node-relay feature: any device in your tailnet (for example, your VPS) can act as a high-throughput relay. It forwards traffic over UDP with throughput close to direct connections, much faster than DERP.
Connection priority: direct → Peer Relay → DERP. The Tailscale pre-installed on FlexKVM already supports this (v1.86+ required), and relay nodes are auto-discovered — no configuration needed on FlexKVM.
Prerequisites
| Condition | Description |
|---|---|
| A VPS | With a public IP; choose a location close to you; Linux |
| Admin rights | Tailscale account must be Owner / Admin / Network admin (ACL changes needed) |
| Same tailnet | VPS and FlexKVM must log in to the same Tailscale account |
| UDP ports | Open UDP 40000 (relay port) and 41641 (Tailscale default port), see below |
Peer Relay is available on all plans, including the free tier. Relay traffic remains WireGuard end-to-end encrypted — the VPS cannot see the data.
How to Set It Up
1. Create a Relay Tag in the Admin Console
Open Tailscale admin console → Access Controls (JSON), and append to the existing tagOwners field (create it if missing):
"tagOwners": {
    "tag:relay": ["you@example.com"]
}
tag:relay: a custom tag that marks relay devices; used in the later stepsyou@example.com: replace with your Tailscale account — must be Owner / Admin / Network admin
You must authorize the tag to yourself first; otherwise
tailscale up --advertise-tags=tag:relayon the VPS will fail withrequested tags not permitted.
2. Install Tailscale on the VPS and Log In
curl -fsSL https://tailscale.com/install.sh | sh
sudo tailscale up --hostname=relay-01 --advertise-tags=tag:relay
--hostname: name the relay device (e.g.,relay-01)--advertise-tags: mark this device as a relay; must be the tag from step 1
The terminal prints a login link — open it in a browser and log in. Make sure the VPS joins the same tailnet as FlexKVM.
3. Open the UDP Ports
Two UDP ports are required (the relay port uses 40000 here; feel free to change it):
- 40000: the Peer Relay port, must match the value set in step 4
- 41641: Tailscale's default WireGuard port; other devices need it to reach the VPS
sudo ufw allow 40000/udp && sudo ufw allow 41641/udp    # ufw (Ubuntu)
sudo firewall-cmd --permanent --add-port=40000/udp && sudo firewall-cmd --permanent --add-port=41641/udp && sudo firewall-cmd --reload    # firewalld (CentOS)
For Alibaba Cloud, Tencent Cloud, etc., also add inbound UDP 40000 and 41641 rules in the security group.
4. Enable Relay Mode
sudo tailscale set --relay-server-port=40000
The port can be any reachable UDP port. To disable:
sudo tailscale set --relay-server-port=""
If the VPS is behind port forwarding or a load balancer (NLB) where the port can't be auto-discovered, declare the public endpoint manually with
--relay-server-static-endpoints:sudo tailscale set --relay-server-port=40000 --relay-server-static-endpoints="[public-IP]:40000"
5. Authorize in the Admin Console
Open Tailscale admin console → Access Controls (JSON), and append the following entry at the end of the existing grants array (keep all your existing rules untouched):
{
    "src": ["100.x.x.x", "100.y.y.y"],
    "dst": ["tag:relay"],
    "app": {"tailscale.com/cap/relay": []}
}
src: devices allowed to use the relay — fill in their Tailscale IPs one by one (e.g., FlexKVM and your computer), separated by commasdst: the relay device — usetag:relayfrom step 1 (or the VPS's Tailscale IP if you don't use tags)
Only add devices that really need acceleration to
src; don't use"src": ["*"]— devices without relay needs would take an unnecessary extra hop and add latency. If you never configured ACLs before (devices are open by default), this single entry is all you need.
6. Verify
On the accessing device (e.g., your computer):
tailscale status
tailscale ping <FlexKVM's Tailscale IP>
When a direct connection isn't possible, the connection type shows peer-relay and ping reports via peer-relay:<ip>:<udp-port> — the relay is working. If it shows direct, you're already on the best path.
# tailscale ping 100.118.167.14
pong from flexkvm-6jzde-1 (100.118.167.14) via DERP(sfo) in 335ms
pong from flexkvm-6jzde-1 (100.118.167.14) via peer-relay(public-ip:40000:vni:39) in 36ms
pong from flexkvm-6jzde-1 (100.118.167.14) via peer-relay(public-ip:40000:vni:39) in 35ms
If the relay doesn't take effect after configuration, restart the Tailscale service on the VPS and test again:
sudo systemctl restart tailscaled
Troubleshooting
| Symptom | Likely cause | Try this first |
|---|---|---|
| Toggle grayed out | Tailscale not properly pre-installed | Contact technical support |
| Login page won't open | Network issue | Check if FlexKVM has internet access |
| Login says device already registered | Device is in another Tailnet | Remove the old device from Tailscale admin console and retry |
| Can't connect remotely | Control device missing Tailscale or wrong account | Install Tailscale on control device and log into the same account |